

Webhook setup for integration builders
Getting started
This guide covers how to register a webhook via the API, secure your endpoint, and handle events reliably in production.
Webhooks are set up once. For most integrations, that happens during onboarding, right after you get OAuth access. If your workflow differs, trigger the webhook creation whenever it fits — just make sure you have the correct authentication details at that point.
Once created, every time the user takes an action in Aircall — a call ends, a tag is applied, a message is received — Aircall fires an event to your server automatically. Your integration then decides what to do with it.
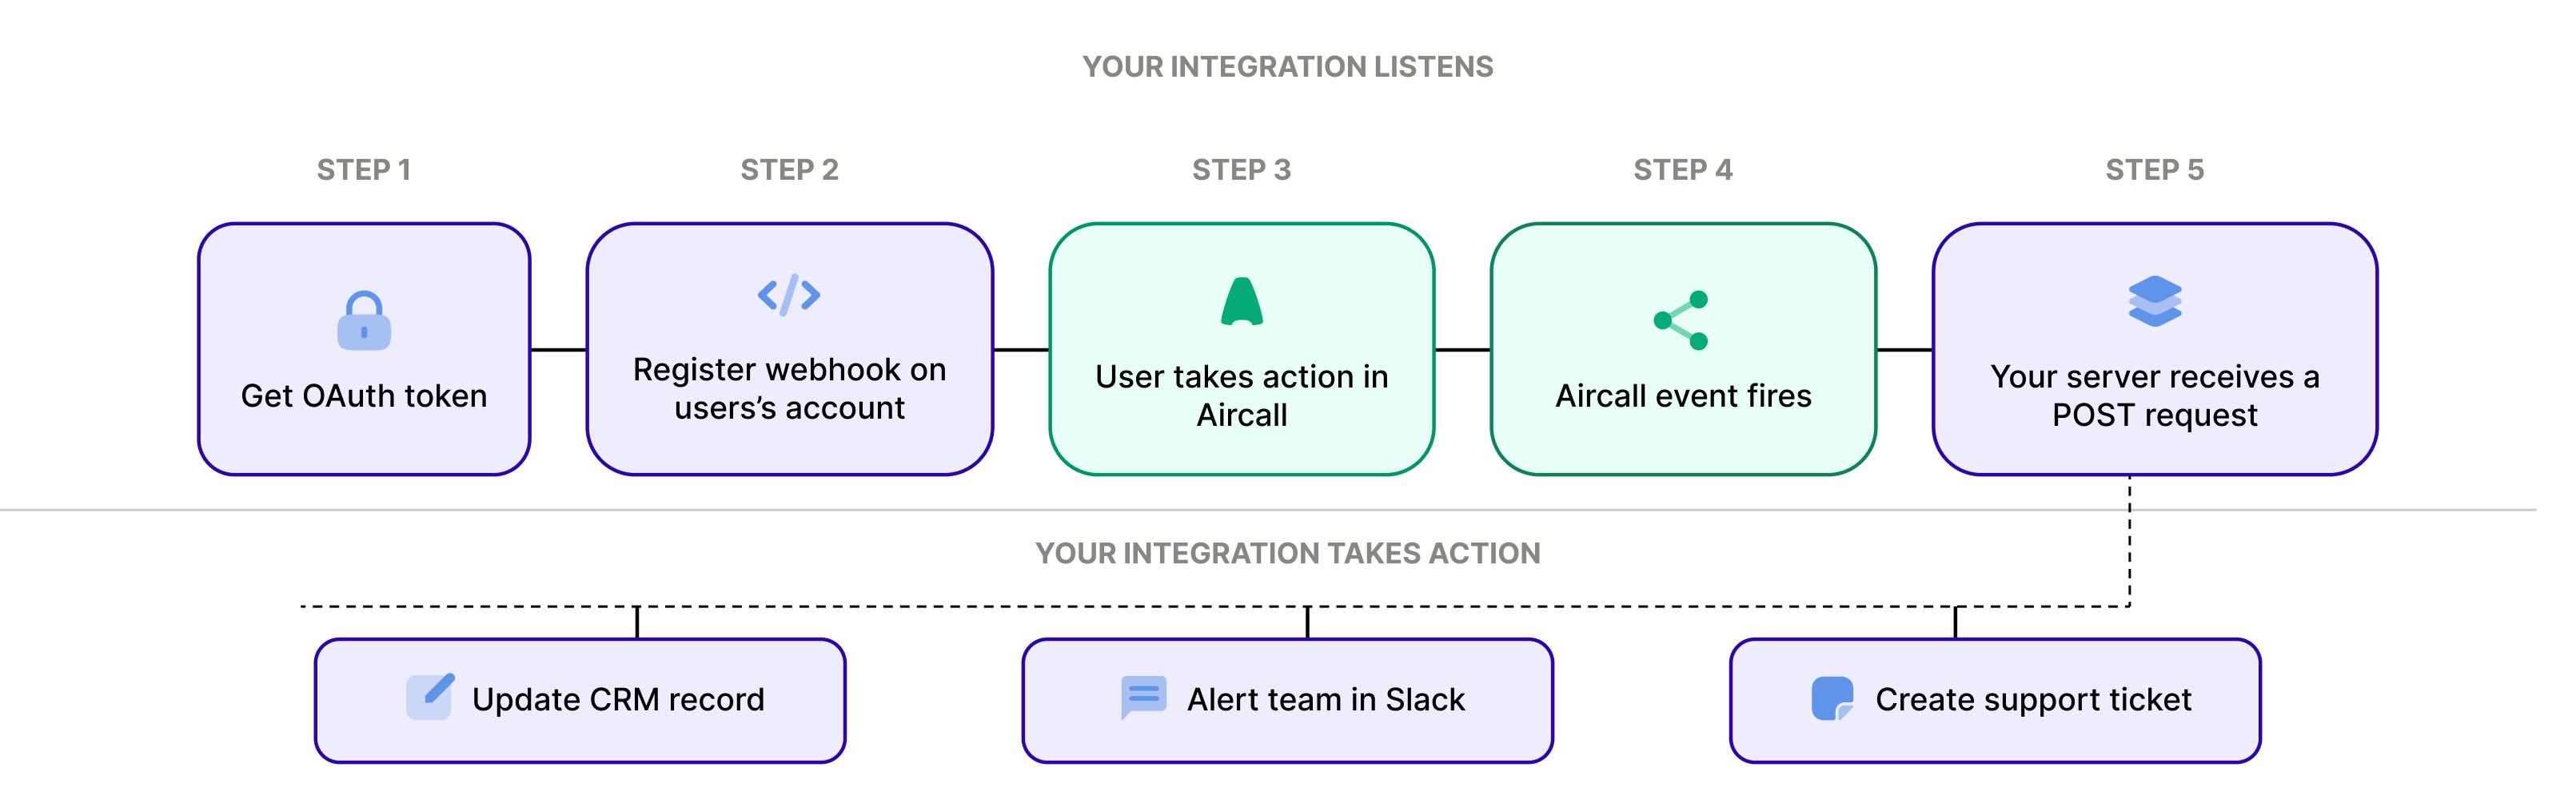
This guide is for developers building apps on Aircall. You'll need a registered App, a public HTTPS server, and an OAuth access token. Haven't set up OAuth yet? Start with the Set Up OAuth for Your Integration guide first.
Create a Webhook via the API
Creating a webhook programmatically lets you register it on a user's Aircall account without any manual steps on their end — ideal for integration onboarding flows.
Send a POST request to /v1/webhooks using the user's access token:
const createWebhook = async (accessToken) => {
   const response = await fetch('https://api.aircall.io/v1/webhooks', {
      method: 'POST',
      headers: {
         'Authorization': `Bearer ${accessToken}`,
         'Content-Type': 'application/json'
      },
      body: JSON.stringify({
         custom_name: 'YOUR_APP_NAME',
         url: 'https://your.server.com/aircall/webhook',
         // Omitting 'events' defaults to receiving all webhook events.
         events: ['call.ended', 'call.tagged', 'call.commented']
      })
   });

   const data = await response.json();

   if (!response.ok) {
      throw new Error(data.message || 'Failed to create webhook');
   }

   // Store webhookToken against the user or company in your system.
   const webhookToken = data.webhook.token;
   return webhookToken;
};
The webhook token
The response includes a token unique to this Webhook. Aircall attaches this token to every event it sends. Store it against the user or company in your system to:
- Identify which Aircall account an incoming event belongs to
- Verify that events genuinely originate from Aircall
Create a Webhook handler
Once your Webhook is registered, you need an endpoint on your server to receive events. Set up a POST route that accepts Aircall payloads, responds immediately with 200, and hands off processing asynchronously.
const express = require('express');
const app = express(); app.use(express.json());

app.post('/aircall/webhook', (req, res) => {
   const { event, data } = req.body;

   // processEvent is called before sendStatus but is not awaited —
   // it runs asynchronously and won't block the response
   processEvent(event, data).catch(console.error);

   res.sendStatus(200);
});

const processEvent = async (event, data) => {
   switch (event) {
      case 'call.ended':
         await syncCallRecord(data);
         break;
      case 'call.tagged':
      case 'call.commented':
         await updateCallRecord(data.id, data);
         break;
      default:
         await logEvent(event, data);
   }
};

app.listen(3000);
That's it — your integration is now listening to Aircall in real time. The handler responds immediately and processes each event asynchronously, so you're never left waiting on one event before the next arrives. What you do with each event from here is up to you.
Updated 3 months ago
What’s Next
Now that you have your Webhook endpoint set up and receiving events, here are a few things to explore next: