

Custom Actions
Getting Started
Connect AIVA to your own APIs mid-conversation — read data, write records, trigger workflows — all without transferring to a human agent.
Custom API actions give AIVA the ability to make HTTP calls during a live conversation. They cover both read and write operations — making them far more powerful than a simple data lookup.
Fetch order status, account details, or appointment availability and read the result back to the caller.
Create a support ticket, book an appointment, or register a callback request directly from the call.
Update a delivery address, change a subscription tier, or mark a case as resolved while the caller is on the line.
Cancel an order, remove a record, or trigger a downstream process — with the agent confirming the outcome to the caller.
Configure actions in the Dashboard
You can't configure actions through the API. Go to Dashboard → AI Voice Agents → Custom capabilities to set them up. Each action applies across your account.
To try this feature, prepare the following:
- Configure an Aircall account with at least one AI Voice Agent.
- Expose a publicly accessible HTTPS endpoint. HTTP is not supported.
- Create valid credentials for that endpoint — API key, bearer token, or username and password.
- Confirm your API's request structure: URL, HTTP method, required parameters, and the shape of the JSON response.
Setup
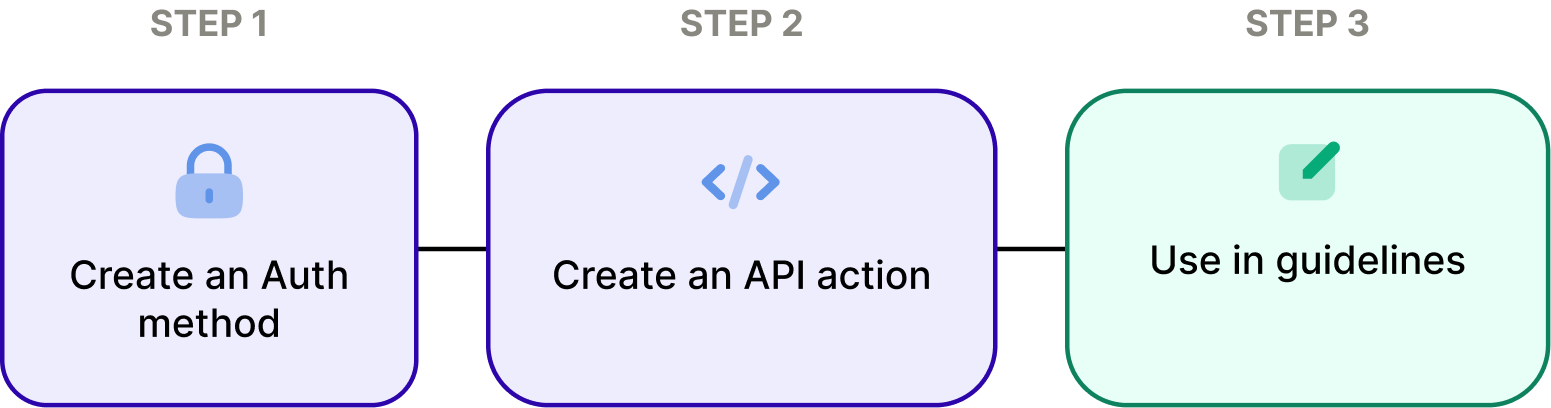
Create an authentication method
Click Add Authentication Method. Give it a descriptive Name — you select this name when configuring actions later, so something like Shopify Storefront API or Zendesk Prod is easier to work with than a generic label.
The Service Name and Description fields are optional but useful when you have multiple methods of the same type.
Select an Authentication Type from the dropdown. Update the credential fields depending on your choice:
| Type | Credential fields |
|---|---|
| API Key | Key Name (e.g. X-API-Key), Key Value, and a Location toggle — Header or Query. |
| Bearer Token | Token — sent as Authorization: Bearer <token>. |
| Basic Authentication | Username and Password — base64-encoded and sent as Authorization: Basic <encoded>. |
| OAuth 2.0 | Client ID, Client Secret, Token URL, and scope — for a client credentials flow. |
| Resource Owner Password | Username, Password, Client ID, Client Secret, and Token URL — for OAuth 2.0 flows that require user credentials. |
Optionally, enter a Test URL and click Test Connection after saving to verify the credentials work. Click Save Changes.
Authentication methods are account-scoped
Every action in your agents can reference the same authentication method, so create each set of credentials only once.
Create an API action
Click Create API Action. The panel that opens has five sections. Work through them in order.
- Basic Information
- Action Name — a short identifier you'll reference in Conversational guidelines, e.g. GetOrderStatus.
- Description — write it from the agent's perspective so it knows when to invoke this action: "Use this when the caller asks about their order."
- Input Parameters
- Parameters are values the agent collects from the caller and injects into the request. Click Add Parameter for each one.
- Use
snake_casefor the Parameter Name (e.g.order_id) — this is the{{order_id}}variable you'll use in the URL or body. - Description tells the agent what to ask the caller for. Add a Validation Pattern (Regex) and Validation Error Message to validate input before the call is made. Check Required parameter and Use for validation as needed.
- API Configuration
- Set the full HTTPS API URL — inject parameters with
{{variable}}syntax anywhere in the URL or body, for examplehttps://api.example.com/orders/{{order_id}}. - Choose the HTTP Method: GET for reads, POST/PUT for writes, DELETE for cancellations and removals.
- Select the Authentication Method from Step 1, or No authentication for public endpoints.
- Add extra Request Headers with Add Header if needed.
- Set the full HTTPS API URL — inject parameters with
- Output Field Mapping
Click Add Mapping for each response field the agent should use. Set the JSONPath Expression (e.g.order.status), an Output Field Name, a Description of what the value contains, and an optional Fallback Value. Map only what the caller needs to hear. - AI Response Instructions The optional On Success Instruction tells the agent how to present the result — e.g. "Read the status and delivery date conversationally. Format dates as 'Month Day'. Don't read raw field names."
Reference the action in your Conversational guidelines
Go to Call script → Conversational guidelines. Tell the agent:
- When to call the action
- What to collect first
- How to present the result
- How to handle failures.
Use the exact Action Name — if it doesn't match, the agent won't know which action to invoke.
## Order status

When a caller asks about their order:

1. Ask for their order ID if not provided.
2. Call GetOrderStatus using {{order_id}}.
3. Read the result naturally. Format dates as "Month Day".
4. If the action fails, apologise and offer to transfer.

Never read raw field names or date strings.## Cancel an order
When a caller asks to cancel their order:
1. Ask for their order ID and confirm the cancellation.
2. Call CancelOrder using {{order_id}}.
3. Confirm: "Done, your order has been cancelled."
4. If the action fails, apologise and offer to transfer.Test your action
Click Test call in the top-right corner to start a mock conversation. Test both the happy path and a failure case to make sure the agent handles errors gracefully.
Test calls invoke real API calls
The agent hits your actual endpoint. Point the URL at a staging environment while developing.
Common issues
| Symptom | Likely cause and fix |
|---|---|
| Agent never calls the action | The action hasn't been added via AI actions, or the guidelines don't use its exact Action Name. |
| Agent says it couldn't retrieve the information | Non-2xx response, auth failure, or a JSONPath expression that doesn't match. Check your server logs and test expressions at jsonpath.com. |
| Variables not substituted in the URL or body | The {{variable}} name doesn't exactly match the Parameter Name, or the agent didn't collect the value before calling. |
| OAuth 2.0 authentication fails | Verify the Client ID, Client Secret, Token URL, and scope for the client credentials flow. |
| Agent reads raw dates or field names aloud | Add formatting instructions to On Success Instruction or your guidelines. |
The real constraint
The context window is the real constraint. The more actions and conversation history an agent manages at once, the harder you're pushing against that limit. When you hit it, or when the flow gets too complex, split the workload. Build one agent for triage and qualification, then configure it to transfer calls to a second agent for billing, a third for cancellations, and so on. Each agent stays focused, fast, and effective — together they cover everything.
Wrapping up
This is a simple, yet powerful feature. You can combine as many actions as you need — different endpoints, different products, different authentication methods — all within a single agent. One action looks up a customer record, another checks inventory, another creates a ticket. Your agent becomes a purpose-built orchestrator for your exact stack.
Updated 3 months ago