-
ExploreCategories
Streamline form input into a unique Salesforce case during interviews with applicants using Aircall
In this guide you will learn 🎓
- How Would an Education Institution Utilise Using Aircall to Create Cases with Streamlined Form Input in Salesforce?
- How to Create your Interview Form Screen Flow
- Step One: Creating the Custom Field on the Case Object
- Step Two: Setting the Interview Questions with Screen Flows
- Step Three: Creating our Record ID Variable and Get Records Action
- Step Four: Creating our Rich Form Notes Variable and Create Case Action
- Step Five: Updating the Aircall Call Task with the Case ID
- Step Six: Adding the Form to the Contact Page
How Would an Education Institution Utilise Using Aircall to Create Cases with Streamlined Form Input in Salesforce?
Fitzroy Art School is a small tertiary institution offering courses in Fine Arts. Each year they receive a large number of applications from both Domestic and International students vying for a spot to either start in Semester 1 or Semester 2 of that year.
The Admission process involves an initial phone interview with an admission co-ordinator whilst reviewing that their submitted portfolio includes all the requirements. If successful in this first phase, the applicant is then invited to an in-person or video conference interview.
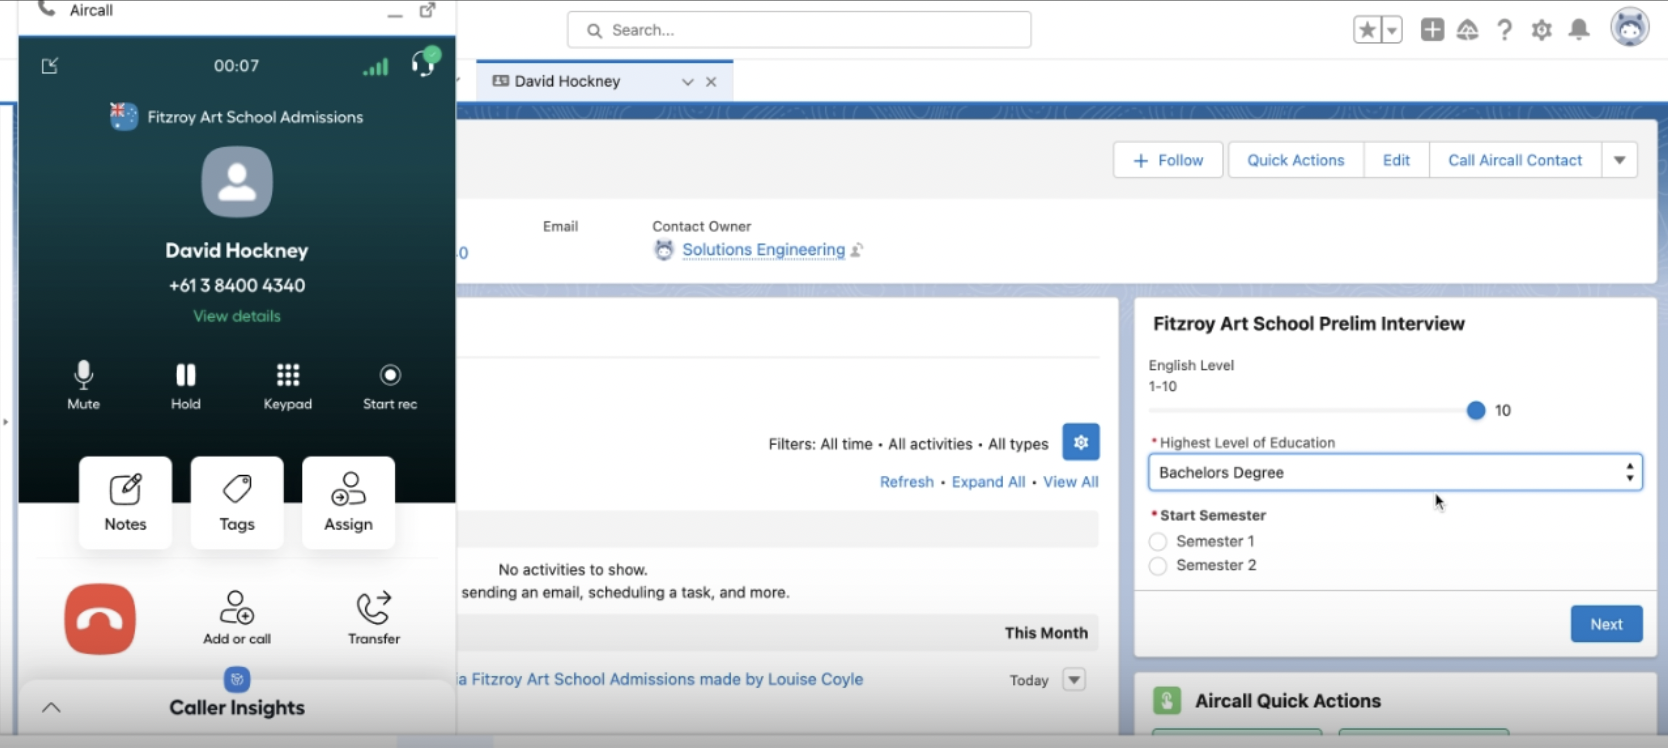
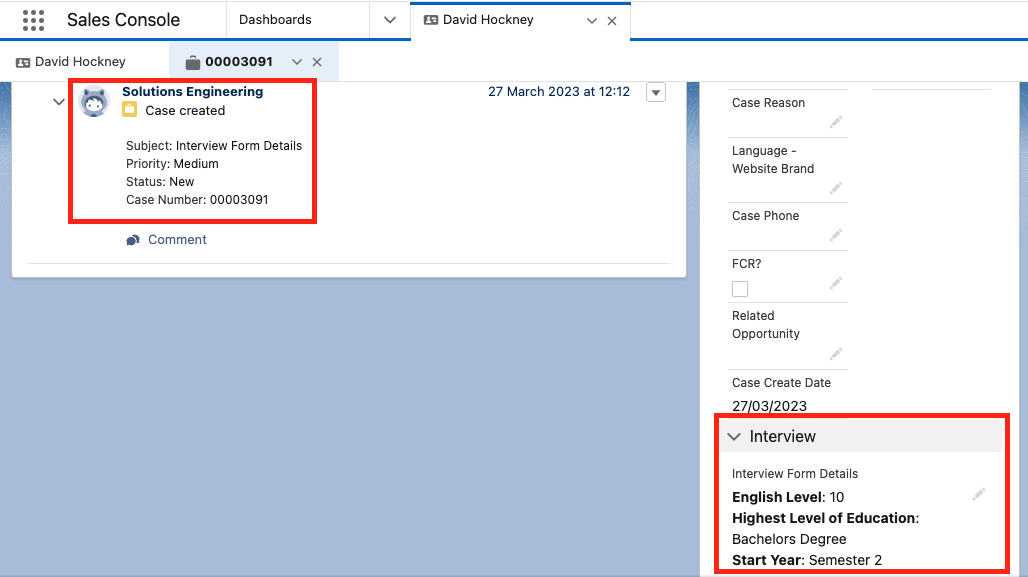
The initial phone interview comprises of 3 mandatory questions:
- English Level
- Highest Level of Education
- Start Year
The Admissions Manager was noticing that there was inconsistency across the interviews in terms of what was written by the interviewers. They also struggled to locate the specific Task connected to the call that the interview took place on. In an effort to control the input of answers by the interviewers, they decided to do a Form Input using Screen Flows in Salesforce which would standardise the interview process. They also decided to create a separate case for these interviews and relate it to the Task created by the call, so they can easily identify the interview on the Contact profile of the applicant.
Let’s see how they would set this up!
We will be using the use case above as an example throughout the tutorial. In the sections where we are naming or labelling anything company specific, use your own company names and terminology as you wish. You can also customise the parameters of inputs to suit your needs
How to Create your Interview Form Screen Flow
Step One: Creating the Custom Field on the Case Object
This workflow requires us to create a custom field on the Case object, which is where we will store the input options from the interview form.
In your Salesforce Org, navigate to Setup and click on the Object Manager tab (if it doesn’t automatically appear, use the quick find bar). From the Object Manager page, select the Case object. This will open the details page, and on the left-hand sidebar you will click into Fields and Relationships. Select New and follow the below process for each prompted step:
- Step 1: Data Type=
Text Area (Rich) - Step 2: Field Label=
Interview Form Details- Number of Visible Lines=
25 - Field Name=
Interview_Form_Details
- Number of Visible Lines=
- Step 3: Field Level Security. This section is at your discretion over who has edit or read only access rights to this specific field.
- Step 4: Page Layouts. This section is at your discretion about which page layouts this field should be visible on.
Click on Save. Your field should now be visible in the fields list.
You can use the Case Page Layout editor to give prominence to the Interview Form Details custom field in regards to the interface on the Case object
Step Two: Setting the Interview Questions with Screen Flows
This section requires sufficient familiarity with Salesforce Screen Flows. If you are new to this aspect of Salesforce or have not used their Process Automations before, see their help section dedicated to all things Flows here
Now that we have our Custom Field, we need to start to set up the main section where the agent will be inputting the standard information. We build this in Flows within the Process Automation section of Salesforce. Select Setup → Process Automation → Flows and select New Flow. We are going to be creating a Screen Flow. The Screen Flow element is where we define and set the parameters for each question that is going to make up the form. You can choose any components for input you like, however for this we will be using Slider, Picklist and Radio Buttons components for each respective question.
For this tutorial, we will be using the Free-Form layout on the flow editing page and referencing steps in alignment with that setting
From the left-hand side Toolbox, find Screen and drag it onto the editing canvas. On the right-hand side of the screen, you will see Screen Properties which is where you will have to give the Screen element a label, which we will call Interview Form.
From the Components menu on the left-hand side, find and drag Slider into the editing section. This will automatically open up the Slider Properties menu on the right-hand side. Configure the parameters below:
- API Name=
English_Level - Label=
English Level - Range Maximum=
10 - Range Minimum=
1 - Slider Size=
Medium - Step Size=
1 - Value=
5
Do not click Done on the Screen screen at the end of each component. Only click Done when you have all the question components configured
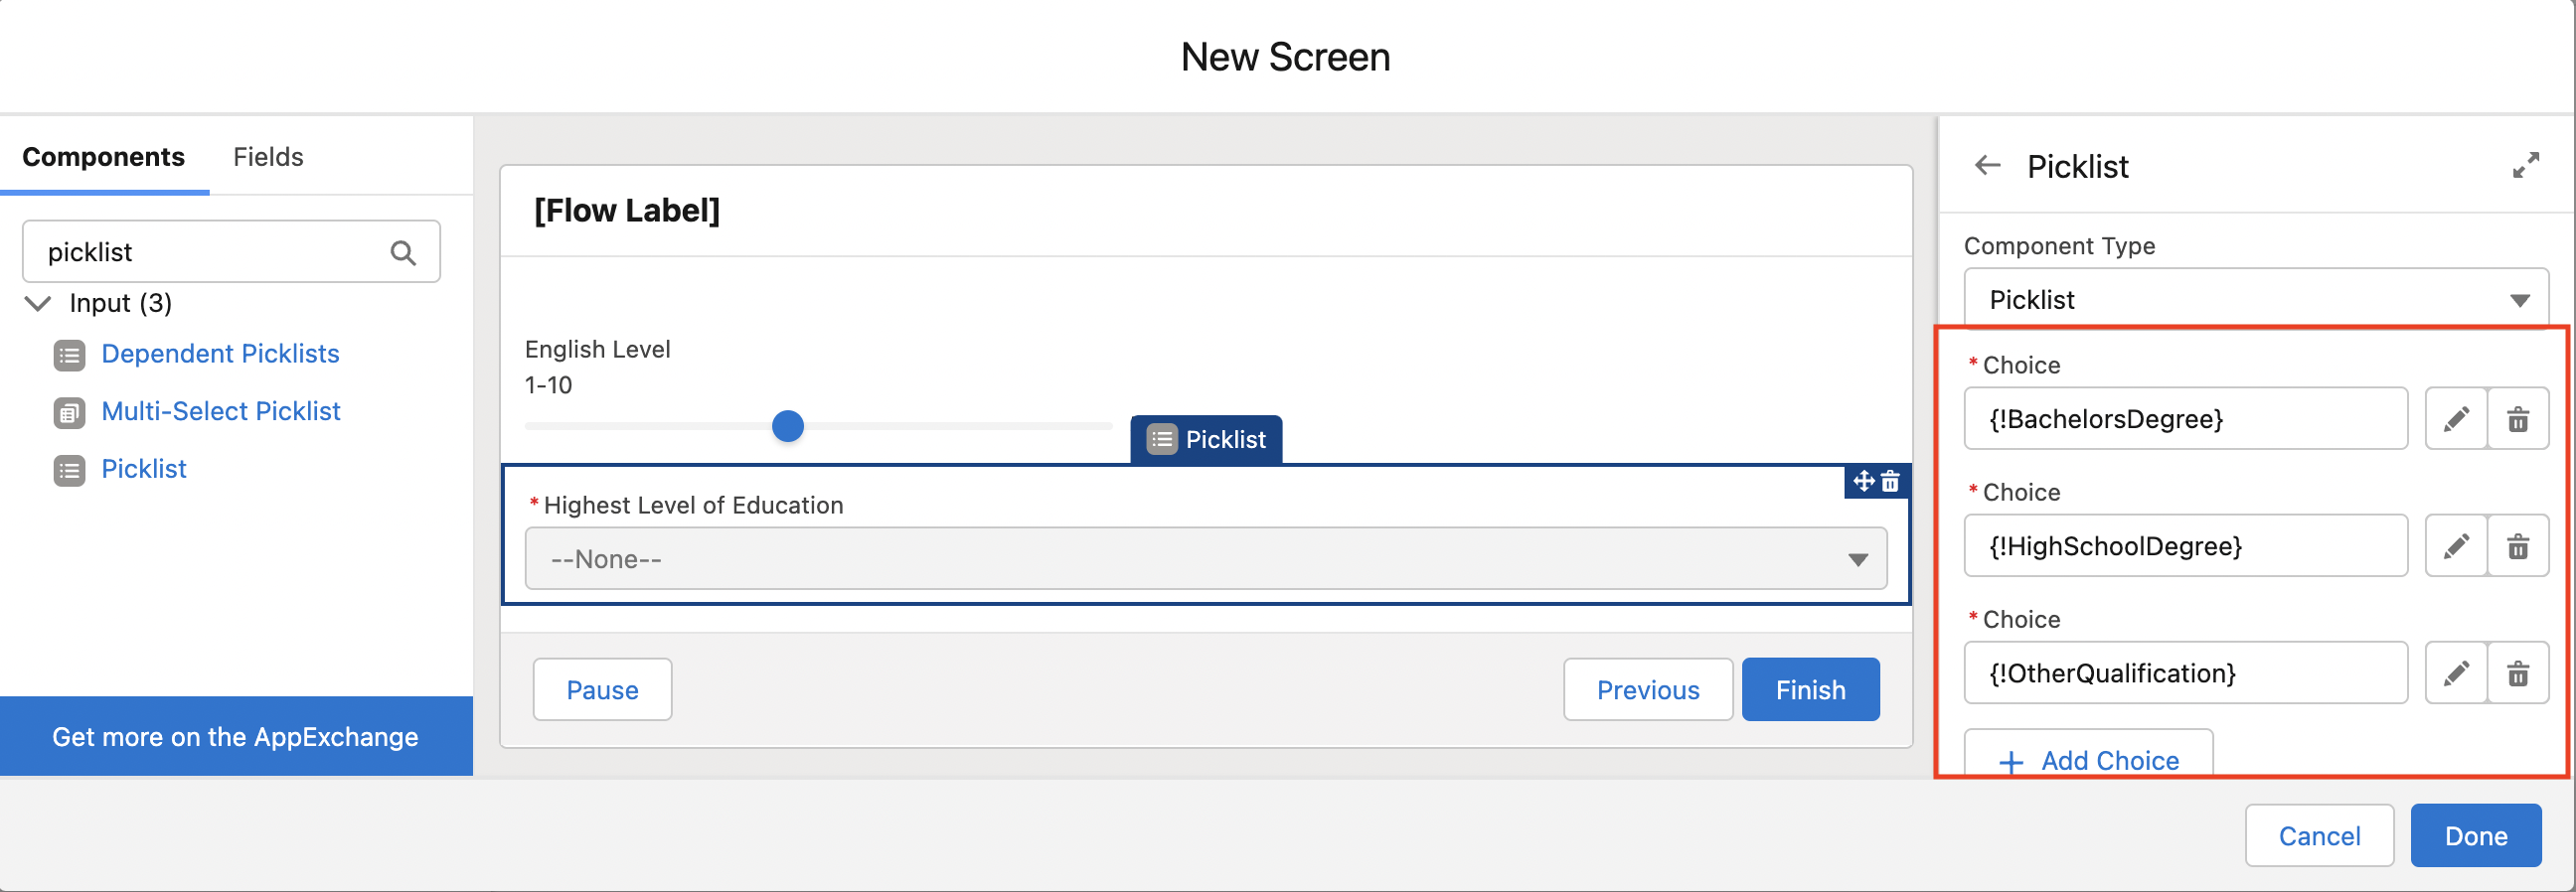
Next, we will use a Picklist. From the Components menu, find and drag Picklist into the editing section. This will automatically open up the Picklist properties menu on the right-hand side. Configuring the Picklist has many steps, so we will break it down into two sections: Basic Parameters and Choice Values. To begin, configure the below parameters:
- Label=
Highest Level of Education - API Name=
Highest_Level_of_Education - Require=
Yes(check the box) - Format=
Text - Multiple Options=
No - Component type=
Picklist
Within this same properties menu, we will set the Choice Values. Click on the Choice box and select + New Choice Resource. Configure the below parameters:
- Resource Type=
Choice - API Name=
Bachelors_Degree - Choice Label=
Bachelors Degree(type this in the freeform text box) - Data Type=
Text - Choice Value=
Bachelors Degree
Click Done which will bring you back to the Picklist properties screen. We have 3 options for Highest Level of Education, so we will need to repeat the above step for the other two. Click + Add Choice which will create another Choice box. Click on the Choice box and select + New Choice Resource and go through the same process for High School Degree, and then again for Other Qualification. Be sure to follow the same format we did for Bachelors Degree for each field, just with the different names to represent the options.
You can add additional Choice Values if you have more granular or industry-specific qualifications needed in your Picklist
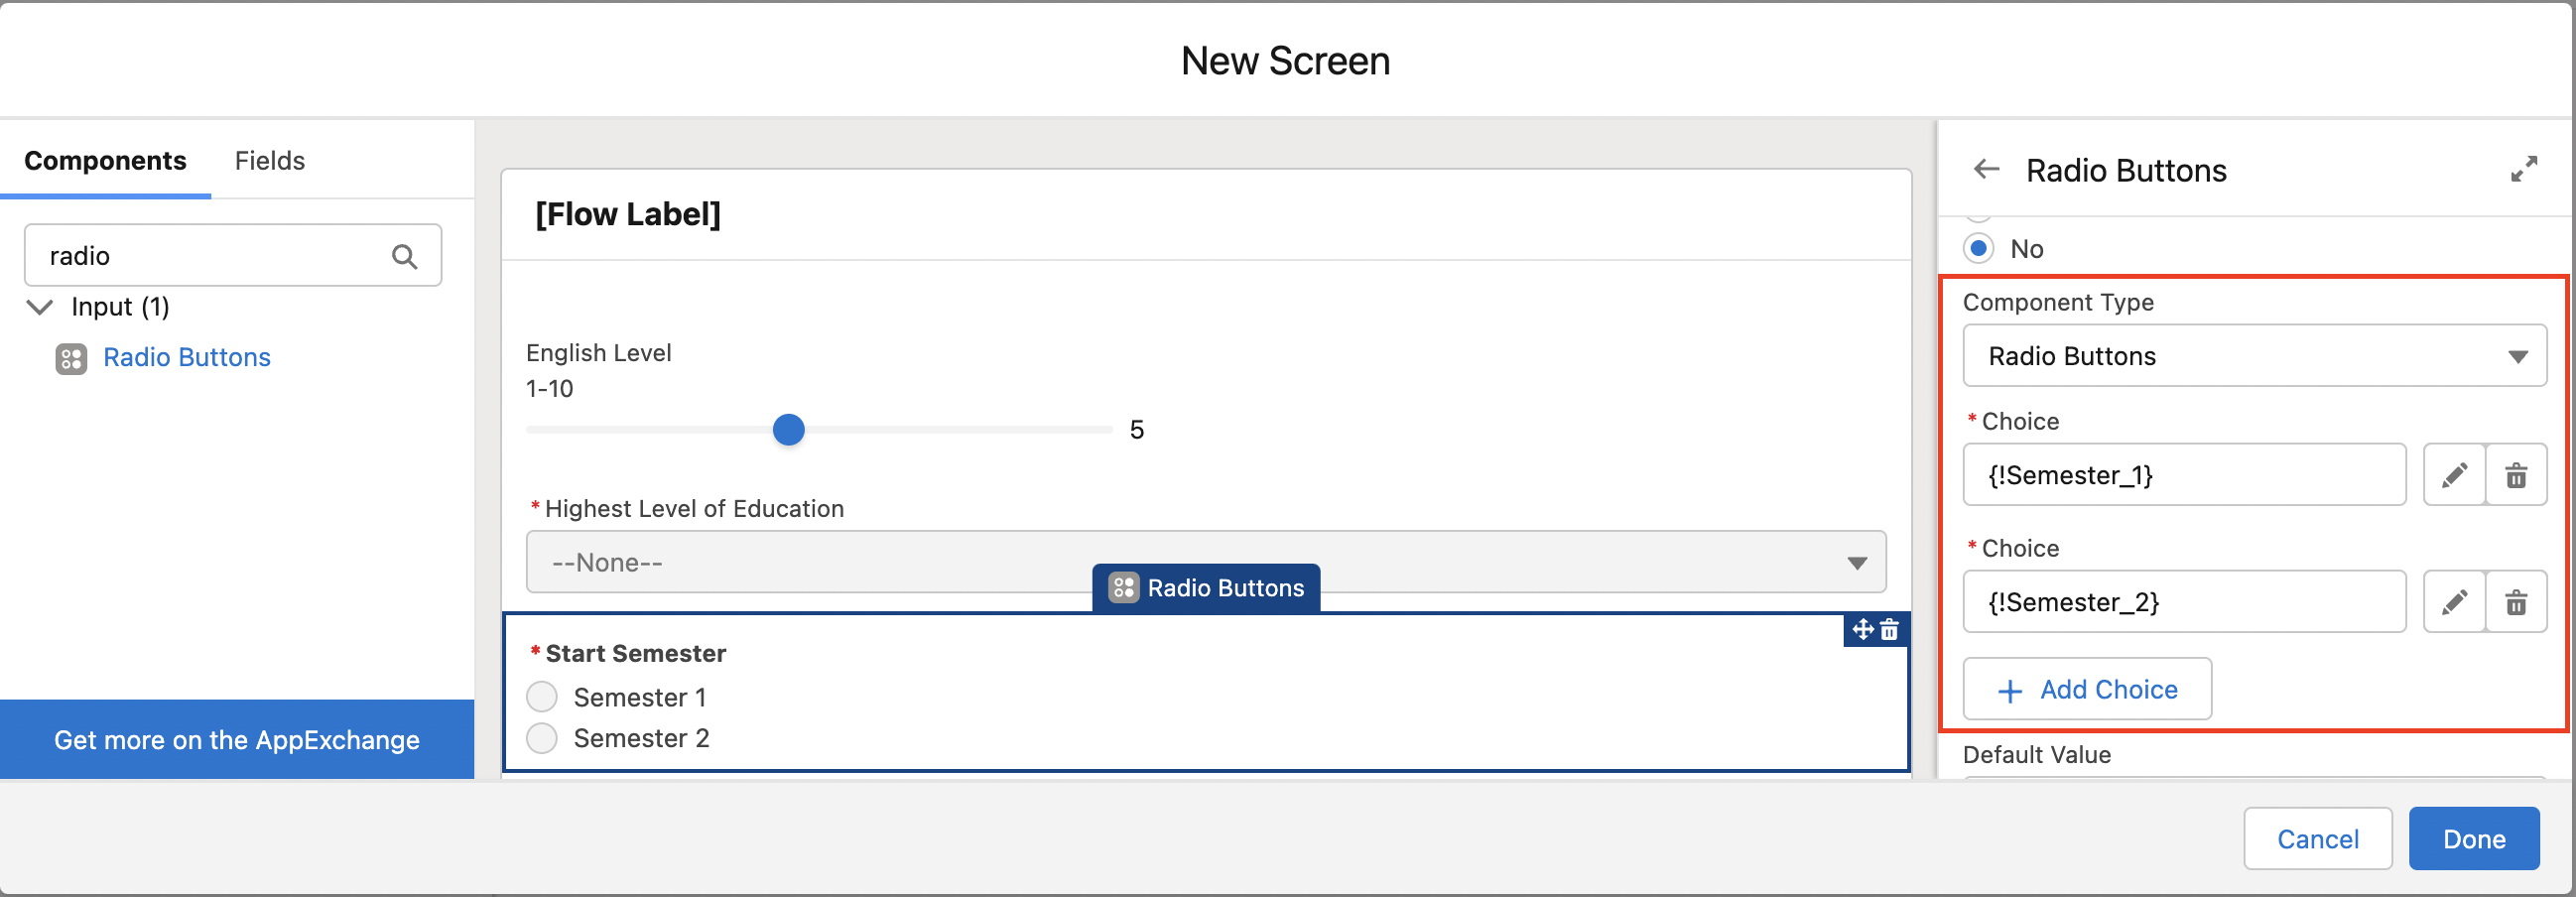
The final one we are going to add is a Radio Buttons choice. From the Components menu, find and drag Radio Buttons into the editing section. This will automatically open up the Radio Buttons Properties menu on the right-hand side. Configuring Radio Buttons has the same logic as a Picklist in regards to setting the Choice Values. Set the below parameters:
- Label=
Start Semester - API Name=
Start_Semester - Require=
Yes(check the box) - Data Type=
Text - Multiple Options=
No - Component Type=
Radio Buttons
Within this same properties menu, we will set the Choice Values. Click on the Choice box and select + New Choice Resource. Configure the below parameters:
- Resource Type=
Choice - API Name=
Semester_1 - Choice Label=
Semester 1(type this in the freeform text box) - Data Type=
Text - Choice Value=
Semester 1
Click Done which will bring you back to the Radio Buttons properties screen. We have to add the Semester 2 option, so we will need to repeat the above step. Click + Add Choice which will create another Choice box. Click on the Choice box and select + New Choice Resource and go through the same process for Semester 2, being sure to follow the same format we did for Semester 1.
You can add additional Choice Values if you have more intake options. Please note, that if you get date-specific, you will have to update the workflow later on for future dates when needed
We have now completed our 3 questions for our Interview Form input. This concludes our Screen element, so click Done which will return you to the main Screen Flow canvas.
Step Three: Creating our Record ID Variable and Get Records Action
The outcome of the workflow is that we want to create a Case containing the form input, and have it linked to the Aircall call of the interview. To achieve this, we will now have to create a set of actions in the flow.
The first step we are going to use is the Get Records action, which is used to fetch records in the Salesforce org. In this case, we are using it to get the Task so we can link ContactID to the Case.
Before we begin, we will have to create a variable to store the ContactID from the Task. When this flow starts, we want the Task to pass the whoID to this variable so we can leverage it throughout the flow. On the left-hand Toolbox, click on the Manager tab.
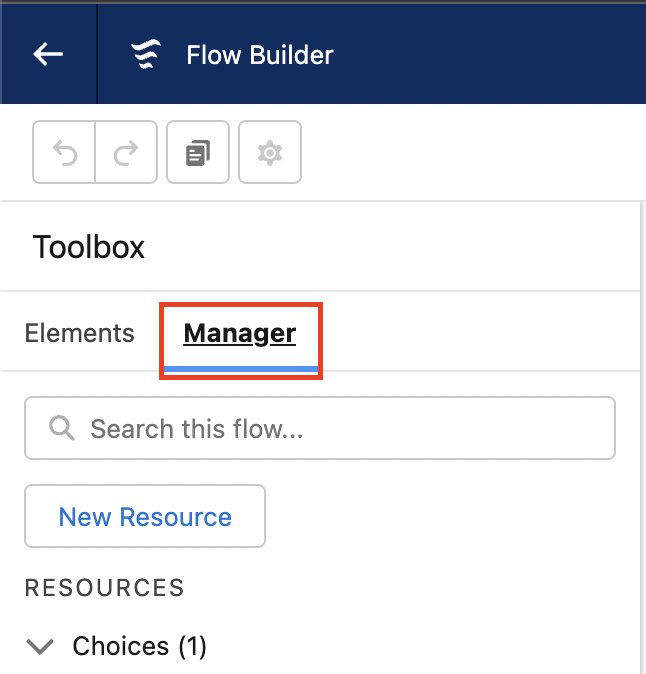
Select New Resource and configure the steps below:
- Resource Type=
Variable - API Name=
RecordID - Data Type=
Text - Availability outside of flow=
Available for input
Click Done. Navigate back to the Elements tab of the Toolbox, find Get Records and drag it onto the editing canvas. Configure the below parameters:
- Label=
Last Aircall Call - Object=
Task - Filter Lead Records=
All Conditions Are Met (AND)- Field=
WhoID→ Operator=Equals→ Value={!RecordID} - Field=
CallDisposition→ Operator=Contains→ Value=aircall
- Field=
- Sort Order=
Descending - Sort By=
CreatedDate - How Many Records to Store=
Only the first record - How to Store Record Data=
Automatically store all fields
Press Done to return to the flow editing canvas. With this action, we now have retrieved the last logged Aircall call Task, which is what we would like to connect the created Case to.

Step Four: Creating our Rich Form Notes Variable and Create Case Action
Next we have to use the Create Records action to create our Case. We also have to create another variable that will pull the inputs from the interview form and populate them in the custom field we created on the Case object.
To start with the variable, navigate to the Manager tab in the Toolbox. Select New Resource and configure the below parameters:
- Resource Type=
Text Template - API Name=
RichFormNotes - Body=
English Level:
{!English_Level.value}Highest Level of Education:{!Highest_Level_of_Education}Start Year:{!Start_Semester}
Click on Done. From the Toolbox, click on the Elements tab, find Create Records and drag onto the editing canvas. Configure the below parameters:
- Label=
Create Case with Form Details - How Many Records to Create=
One - How to Set the Record Fields=
Use separate resources, and literal values - Object=
Case - Set Field Values for the Case=
- Field=
ContactID← Value={!Last_Aircall_Call.WhoId} - Field=
Interview_Form_Details← Value={!RichFormNotes} - Field=
Subject← Value=Interview Form Details
- Field=
Click on Done. Now that we have completed this Create Records action, we have the Case to log the input details of the Interview Form in to.
Step Five: Updating the Aircall Call Task with the Case ID
The final action in our flow is updating the Task created from the Aircall call where the interview was conducted. We need to update it with the CaseID created in the previous step so the Task and the Case are related.
From the Toolbox, find Update Records and drag onto the editing canvas. Configure the below parameters:
- Label=
Update Aircall Call Activity with Case - API Name=
Update_Aircall_Call_Activity_with_Case - How to Find Records to Update and Set Their Values=
Specify conditions to identify records, and set fields individually - Object=
Task - Condition Requirements to Update Records=
All Conditions Are Met (AND)- Field=
ID→ Operator=Equals→{!Last_Aircall_Call.Id}
- Field=
- Set Field Values for the Task Records=
- Field=
WhatID← Value={!Create_Case_with_Form_Details}
- Field=
Click on Done.
You have now finished the Flow Elements, and need to connect them. To add a connector between flow elements, click the node beneath the source element and drag and drop a line anywhere onto a target element. Be sure they are in order we created the actions above.
Click on Save in the top right hand corner of the screen and name your flow. Be sure to select Activate before exiting the page.
Step Six: Adding the Form to the Contact Page
This section requires familiarity with Lightning App Builder. If you are new to this aspect of Salesforce, see their help section about Lightning App Builder
To make our Interview Form visible on the Contact page, we have to change the interface to include the Interview Form. This way agents can do the form input whilst on the phone to the specific Contact.
In the Setup search bar, search for Lightning App Builder. Select the Lightning Page related to your Contact interface and click Edit. Once on the page, decide where in your interface you would like the Interview Form to sit, click on the + and then select Flow from the left-hand Component menu.
Keep in mind that the Aircall CTI will be open when on the call, so make sure that the form is somewhere that is visible whilst on the call
This will open up a list on the right-hand side of the screen. You will notice settings related to the RecordID variable is present, and we want to make sure we enable this. If you do not enable this, then the flow will not work. Configure the below parameters:
- Flow= select the flow that we created in the steps above.
- Layout=
One Column - RecordID= ☑️
Pass record ID into this variable
Click Save.
Congratulations 🎉 You have created your flow that will allow streamlined form input into a unique case!
Food for Thought 💡
- The object we are using here is the
Contact, but it could be done the same withAccounts,Person Accountsor even withLeads. And of course, with another type of secondary object which is not theCaseobject. - The same Screen Flow approach could be use for scripting use cases where we need to qualify those inbound leads. Those updates could directly go to a main object instead of being attached to a secondary object.
- In this case, we leave the ability to the agent to either fill this
Casedetails or not. However, we can use custom reports in SFDC to see how many Aircall callTasksdo not have aCaseattached asWhatID, as a hindsight way to control adherence with processes.
Need Some Extra Help?
If you need an extra hand with implementing this workflow, or you would like to learn more about similar automations to enhance your operations, check out our Professional Services page to book time with our Technical Consultants.