-
ExploreCategories
Give users autonomy to create Opportunities in Salesforce from meaningful Aircall phone calls
In this guide you will learn 🎓
- How Would A High Tech Company Utilise Automatic Creation of Opportunities From an Aircall Task?
- How to Set Up Automatic Opportunity Creation From an Aircall Task
- Step One: Creating the RecordID Variable
- Step Two: Creating the Opportunity Creation Button using Screen Flows
- Step Three: Getting the Last Aircall Call Task
- Step Five: Link the Task to the Opportunity with the Update Records Action
- Step Six: Adding the Opportunity Creation Button to the Contact Page
How Would A High Tech Company Utilise Automatic Creation of Opportunities From an Aircall Task?
Mapsy is an application software that provides detailed information about geographical regions and sites for major cities worldwide. The app has different access levels, starting from basic geographical navigation, through to hospitality recommendations and bookings, events. They do B2C which is self sign up, however they sell B2B to businesses and corporations for their employees to use when travelling for business. The B2B side of the business is handled by Mapsy’s Customer Success Team.
Once a month, Customer Success Managers are given a feature to upsell to as many suitable customers as possible over the course of a day in a call blitz. Their process begins with an outreach phone call on Aircall, to gauge the interest of the prospect in trialling the new feature. If the customer wishes to proceed, they receive a one week trial and a follow up call is scheduled to discuss whether they would like to add the feature to their subscription. For meaningful connects where the customer wants to trial, the CSM must create an opportunity in Salesforce.
The Customer Success Director was finding that the manual creation of opportunities was taking too much time, or that some slipped through the cracks. It was making tracking the success of these call blitz difficult. Furthermore, the CSM’s would usually forget to connect the Task from the phone call to the Opportunity. The Customer Success Director wanted the CSM’s to still have autonomy to determine whether the call warranted an Opportunity being created, but they wanted to take away all the manual work.
Let’s see how they would set this up!
How to Set Up Automatic Opportunity Creation from an Aircall Task
This section requires sufficient familiarity with Salesforce Screen Flows. If you are new to this aspect of Salesforce or have not used their Process Automations before, see their help section dedicated to all things Flows here
Step One: Creating the RecordID Variable
All of our processes will be built using Flows within the Process Automation section of Salesforce. The first element we have to configure is our Task variable. Our Task variable is going to store the ID of the Task created by the Aircall call where the agent opts to create an Opportunity. We will leverage it throughout the flow, but it is particularly important in order to link the Task to the Opportunity.
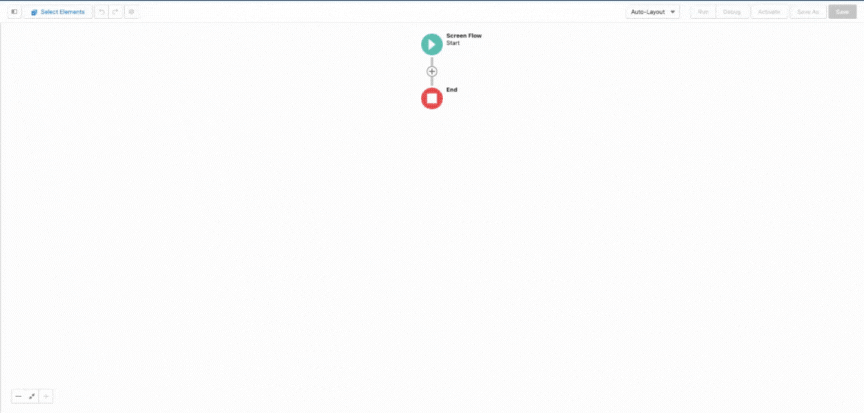
To start, let’s create the flow. Select Setup → Process Automation → Flows and select New Flow. We are going to be creating a Screen Flow. On the blank canvas, open your Toolbox from the top left hand corner of the screen and it will open the Manager tab. Click on New Resource and configure the below parameters:
- Resource Type=
Variable - API Name=
RecordID - Data Type=
Text - Availability Outside the Flow=
Available for Input
Click on Done. We now have our variable stored away for use when we need it. We can now get into building our Screen Flow.
Step Two: Creating the Opportunity Creation Button using Screen Flows
The Screen Flow element is where we define and set the parameters for our Create New Opportunity button that will trigger the Opportunity creation. You can choose any components for input you like, however for this we will be using a single Radio Button.
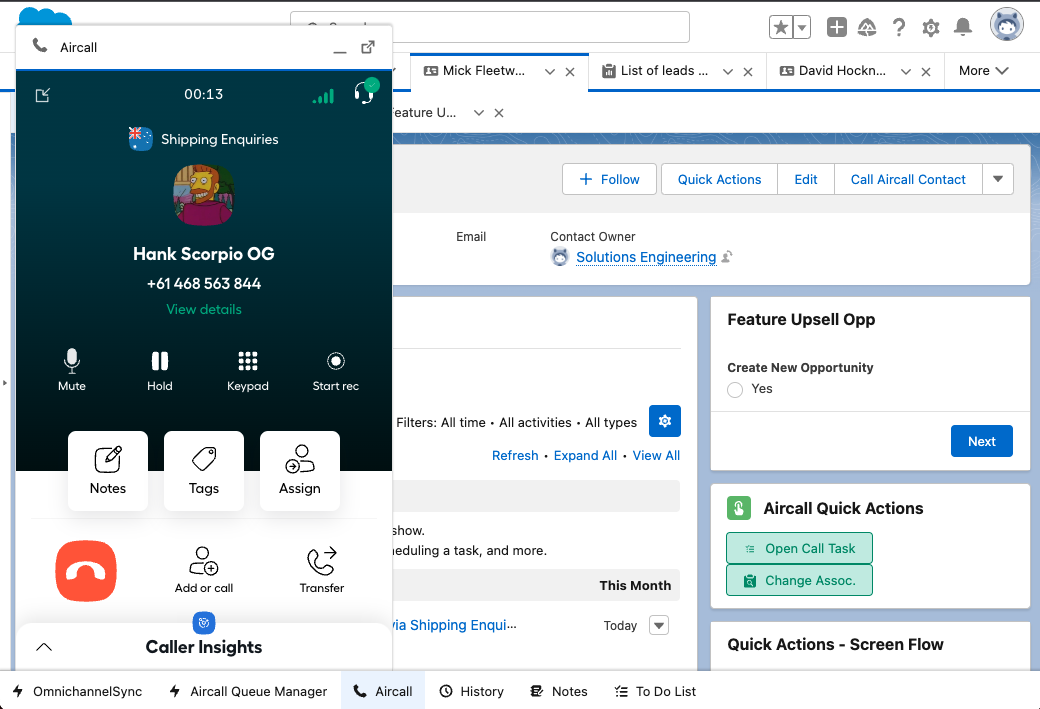
Under the Start symbol, click on the + button to bring up the Add Element menu. Search and select Screen. On the right-hand side of the screen, you will see Screen Properties which is where you will have to give the Screen element a label, which we will call Feature Upsell Opportunity.
From the Components menu on the left-hand side, find and drag Radio Buttons into the editing section. This will automatically open up the Radio Buttons properties menu on the right-hand side. Configure the parameters below:
- Label=
Create New Opportunity - API Name=
Create_New_Opportunity - Require=
Yes (check the box) - Data Type=
Text - Multiple Options=
No - Component Type=
Radio Buttons
Within this same properties menu, we will set the Choice Values. Click on the Choice box and select +New Choice Resource. Configure the below parameters:
- Resource Type=
Choice - API Name=
Yes - Choice Label=
Yes(type this in the freeform text box) - Data Type=
Text - Choice Value=
Yes
Click Done which will bring you back to the Radio Buttons properties screen. This concludes our Screen element, so click Done which will return you to the main Screen Flow canvas.

If you would like your users to have the ability to add the monetary amount of the Opportunity they are discussing on the call, you would add a component in the Screen Flow to allow this. Otherwise the Amount value will be empty, and your users will have to manually adjust it once the Opportunity has been completed
Step Three: Getting the Last Aircall Call Task
Should the user decide to press the Create New Opportunity button, it will trigger a chain of events defined by Actions we create in our flow. The first action we want to configure is Get Records. We want to retrieve the last Aircall call Task, as that will be the call where the Create New Opportunity button was pressed, and therefore the one we want to associate the Opportunity to. Under the Screen action, click on the + button to bring up the Add Element menu. Search and select Get Records. Configure the below parameters:
- Label=
Last Aircall Call - Object=
Task - Filter Lead Records=
All Conditions Are Met (AND)- Field=
WhoID→ Operator=Equals→ Value={!RecordID} - Field=
CallDisposition→ Operator=Contains→ Value=aircall
- Field=
- Sort Order=
Descending - Sort By=
CreatedDate - How Many Records to Store=
Only the first record - How to Store Record Data=
Automatically store all fields
Press Done to return to the flow editing canvas. With this action, we now have retrieved the last logged Aircall call Taskwhich sets us up for our final action later in our flow.

Step Four: Creating the New Opportunity
Next we have to use the Create Records action to create our Opportunity. Under the Get Records action we just created, click on the + button to bring up the Add Element menu. Search and select Create Records. Configure the below parameters:
- Label=
Create Opportunity - How Many Records to Create=
One - How to Set the Record Fields=
Use separate resources, and literal values - Object=
Opportunity - Set Field Values for the Case=
- Field=
ContactID← Value={!Last_Aircall_Call.WhoId} - Field=
CloseDate← Value={!Last_Aircall_Call.CreatedDate} - Field=
Name← Value=Feature Upsell - Field=
StageName← Value= select the stage you would like the Opportunity to be at from your picklist.
- Field=
Click on Done. We now have created our Opportunity that contains fundamental information. Your users will have to manually enter in some details e.g pricing, but the foundations of the Opportunity are automatically populated.

You can add more fields if you would like to pull more information from the Task and put it into the Opportunity. You can continue to use the {!Last_Aircall_Call} variable in conjunction with your desired field.
Step Five: Link the Opportunity to the Task with the Update Records Action
Our final step in the flow is to link the Opportunity to the Task. We are going to achieve this with the Update Records action. Under the Create Records action we just created, click on the + button to bring up the Add Element menu. Search and select Update Records. Configure the below parameters:
- Label=
Link Opportunity to Task - API Name=
Link_Opportunity_to_Task - How to Find Records to Update and Set Their Values=
Specify conditions to identify records, and set fields individually - Object=
Task - Condition Requirements to Update Records=
All Conditions Are Met (AND)- Field=
ID→ Operator=Equals→{!Last_Aircall_Call.Id}
- Field=
- Set Field Values for the Task Records=
- Field=
WhatID← Value={!Create_Opportunity}
- Field=
Click on Done. We have now configured all the steps needed in our flow to achieve our goal. Click on Save in the top right hand corner of the screen and name your flow. Be sure to select Activate before exiting the page.

Step Six: Adding the Opportunity Creation Button to the Account Page
This section requires familiarity with Lightning App Builder. If you are new to this aspect of Salesforce, see their help section about Lightning App Builder
To make our Create New Opportunity button visible on the Account page, we have to change the interface to include Create New Opportunity button . This way agents can push the button whilst on the phone to the specific Contact on the Account page.
In the Setup search bar, search for Lightning App Builder. Select the Lightning Page related to your Account interface and click Edit. Once on the page, decide where in your interface you would like the Create New Opportunity button to sit, click on the + and then select Flow from the left-hand Component menu.
Keep in mind that the Aircall CTI will be open when on the call, so make sure that the form is somewhere that is visible whilst on the call.
This will open up a list on the right-hand side of the screen. You will notice settings related to the RecordIDvariable is present, and we want to make sure we enable this. If you do not enable this, then the flow will not work. Configure the below parameters:
- Flow= select the flow that we created in the steps above
- Layout=
One Column - RecordID= ☑️
Pass record ID into this variable
Click Save.
Congratulations 🎉 You have created your flow that will allow automatic Opportunity creation from a Task! Your created Opportunity will look like this:

Food for Thought 💡
- You could add more question components to your Screen element, and then leverage the answers into populating more fields in the created Opportunity. For example a Slider to indicate the monetary amount of the Opportunity. Alternatively, you could push the answers into a dedicated space in the Opportunity.
- You could implement a tagging system with a tag for a specific feature you are offering. You could then leverage this tag into the Subject of the Opportunity. For Example Feature Upsell- Analytics.
Need Some Extra Help?
If you need an extra hand with implementing this workflow, or you would like to learn more about similar automations to enhance your operations, check out our Professional Services page to book time with our Technical Consultants.